Smash Cake Recipes for Baby's First Birthday

Welcome to the toddler years! Embrace baby's leap into toddlerhood (and lay the groundwork for preventing picky eating before it starts) with our Toddlers at the Table Bundle
To celebrate baby's first birthday, we are delighted to share three of our own cake recipes that the whole family can enjoy… dairy-free, egg-free, and full of yummy goodness!
These recipes are perfect for those with dairy and egg allergies, plant-based families, and those who want to cut down on added sugar. Keep in mind that our smash cake recipes do not produce a dramatic rise like egg-based cakes, so they may seem "flat" when done. Don't worry, you didn't do anything wrong! The recipes rely on fruit and veggies for flavor and structure, which results in a denser, moister cake with just a hint of sweetness—more like your favorite breakfast muffin, and less like a layer cake made with butter, eggs, and refined sugar. Feel free to use refined sugar instead of coconut sugar for a bit more sweetness, omit the coconut sugar to cut out added sugar altogether and let the natural sweetness of the fruits and vegetables take center stage.
Buy a big tub of mascarpone cheese for an easy and delicious topping, but if you want to keep it dairy-free, we’ve got you. Scroll down for a recipe for silky smooth frosting made with coconut cream and sweetened with orange juice. That’s right: a dairy-free, egg-free, and sweetened with fruit juice. We’ve also included directions for coloring the frosting with natural dye from fruit and vegetable juice in case that's up your alley.
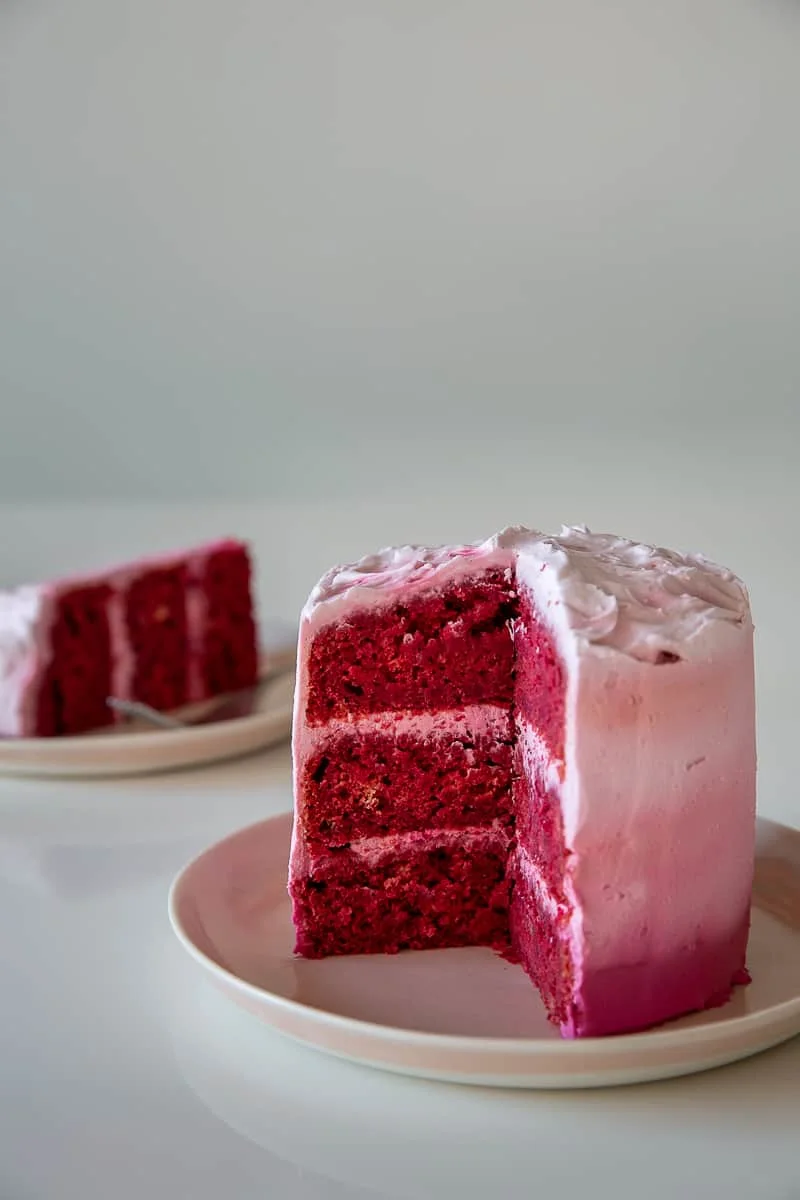
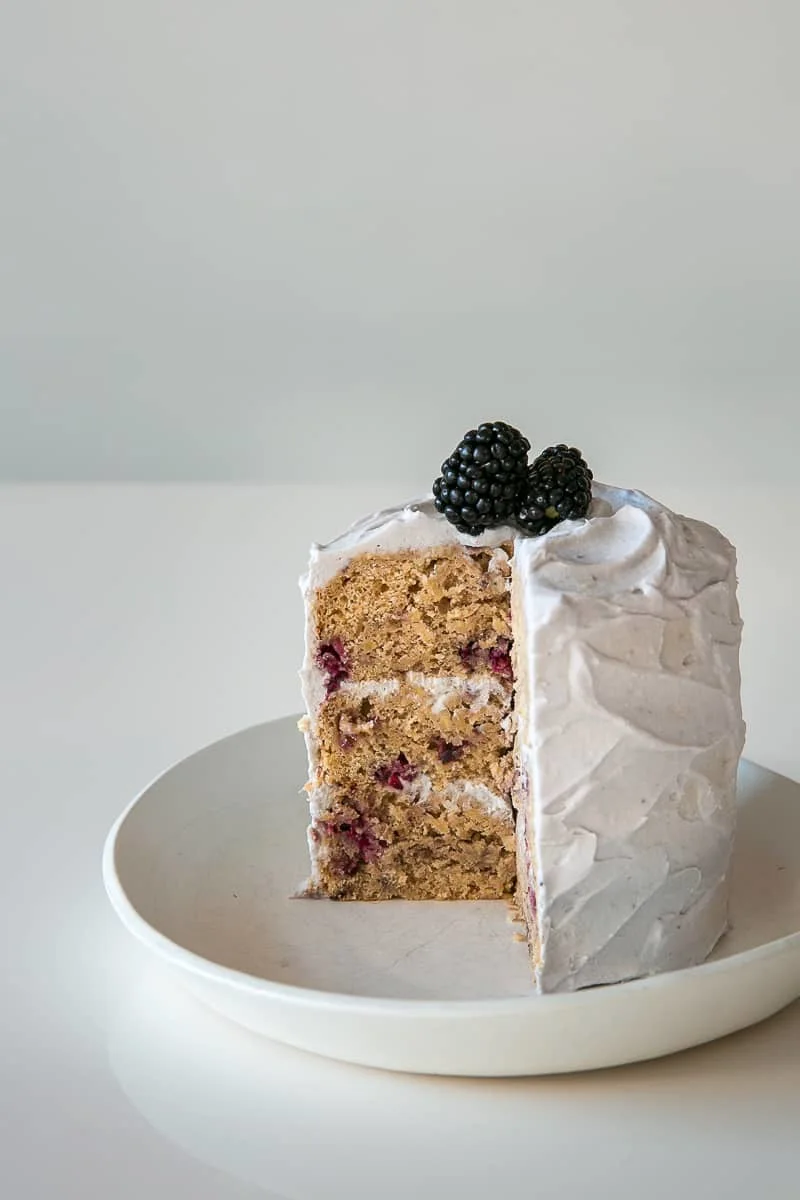
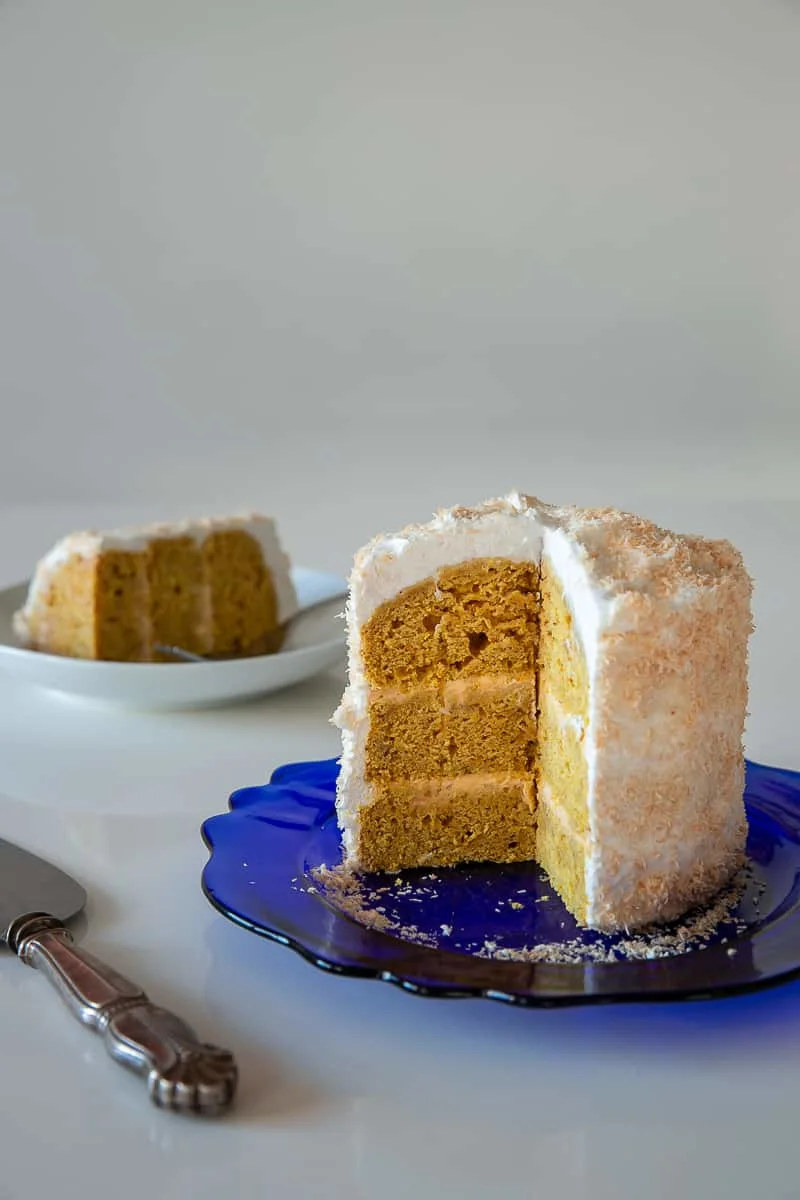
Apple Beet Smash Cake
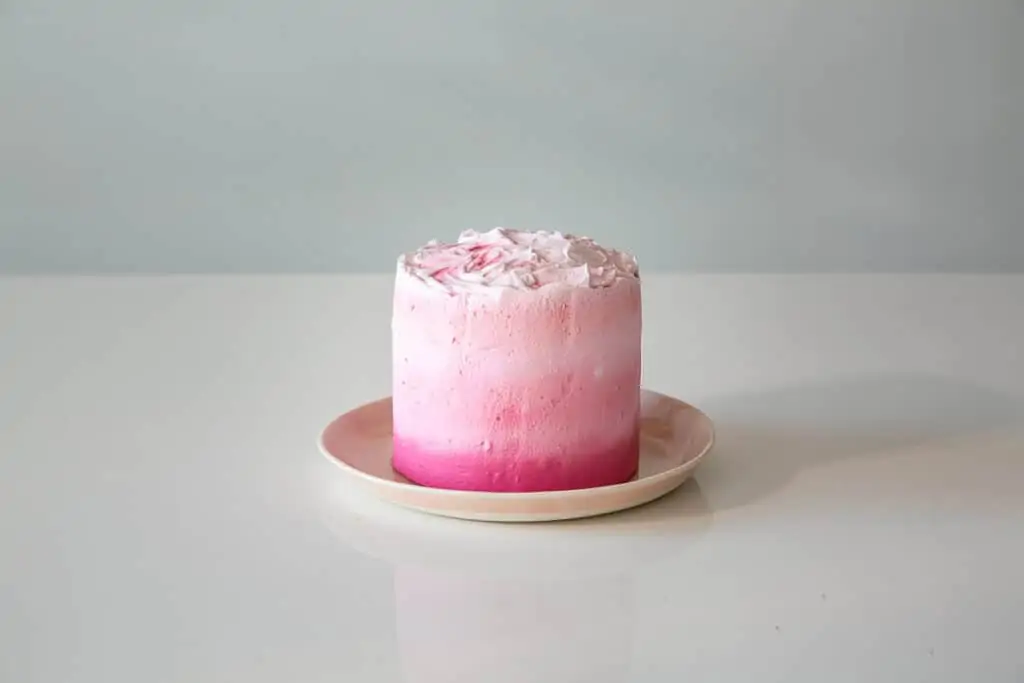
This recipe is perfect for those with dairy and egg allergies, plant-based families, and those who want to cut down on added sugar. Keep in mind that our smash cake recipes do not produce a dramatic rise like egg-based cakes, so they may seem “flat” when done. Don’t worry, you didn’t do anything wrong! The recipes rely on fruit and veggies for flavor and structure, which results in a denser, moister cake with just a hint of sweetness—more like your favorite breakfast muffin, and less like a layer cake made with butter, eggs, and refined sugar. Feel free to omit the coconut sugar to cut out added sugar altogether and let the natural sweetness of the fruits and vegetables take center stage.
Yield: three 4-inch cakes
Prep and Cook Time: 1 hour
Want a bright red cake without artificial food coloring? A raw beet is your friend. Feel free to swap out the cinnamon for your favorite warm spice, but don’t skip the apple cider vinegar—it helps retain the brilliant red hue during the bake.
Ingredients
⅓ c (81 g) applesauce
⅓ c (80 ml) oat milk
⅓ c (64 g) coconut sugar (optional)
1 tbsp (15 ml) apple cider vinegar
1 tsp (5 ml) vanilla extract
1 ½ c (180 g) all-purpose flour
2 tsp (10 g) baking powder
1 tsp (2 g) ground cinnamon (optional)
Modifications
Banana - The riper, the better! If your banana is not yet ripe, using a bit more coconut sugar adds that touch of sweetness.
Beets - If you want the cakes to be bright red, use raw beets. Pre-cooked beets from a can or package add flavor but a more muted color.
Flour - The gluten in wheat flour provides structure to the cake. Gluten-free flour can be substituted, though it creates a gummier texture.
Muffins - If you like, use this recipe to make a batch of muffins in a standard 12-cup tin.
This recipe contains a common allergen: coconut (sugar) and wheat (flour). Only serve to a child after these allergens have been safely introduced. While coconut allergy is rare, it is classified as a tree nut by the US Food and Drug Administration.
Directions
Preheat the oven to 350 F (177 C). Grease cake pans with neutral cooking oil, then line with parchment. Place the cake pans on a sheet tray.
Scrub the beetroots to remove any grit, then peel and finely grate the flesh.
Peel and mash the banana.
Wash, dry, and zest the orange.
Whisk the grated beet, orange zest, applesauce, oat milk, coconut sugar, apple cider vinegar, and vanilla extract in a large mixing bowl.
In a separate mixing bowl, whisk the flour, baking powder, and cinnamon.
Pour the dry ingredients into the bowl with the wet ingredients. Fold the ingredients until no streaks of flour remain. The batter will be sticky and thick.
Evenly distribute the batter in the cake pans. Be sure to leave enough room for the cakes to rise without spilling over the edges. Use the spatula to smooth the tops and push the batter into the edges of the pans.
Bake until a toothpick inserted in the center of a cake comes out clean, about 30 minutes.
Remove the cakes from the oven and place them on a wire rack. Let the cakes cool in their tins for 10 minutes, then release the cakes from their tins to finish cooling on the rack. Wait until the cakes or muffins are cool to the touch before decorating or storing.
Ice the cakes with our Coconut Frosting or icing of choice.
To Store: Apple Beet Smash Cakes may be tightly wrapped in plastic and kept at room temperature for 3 days, in the refrigerator for 1 week, or in the freezer for 2 months. Defrost frozen cakes in the refrigerator a day or two before you plan to serve them. Note that refrigerated or frozen cakes become denser from the chill.
★ Baking for someone with celiac disease or gluten sensitivity? Swap all-purpose flour with your favorite gluten-free alternative, such as Cup4Cup. The texture will likely be denser and gummier, but the cakes will be just as tasty and free of gluten for your loved ones!
Blackberry Parsnip Smash Cake
Yield: three 4-inch cakes
Time: 1 hour
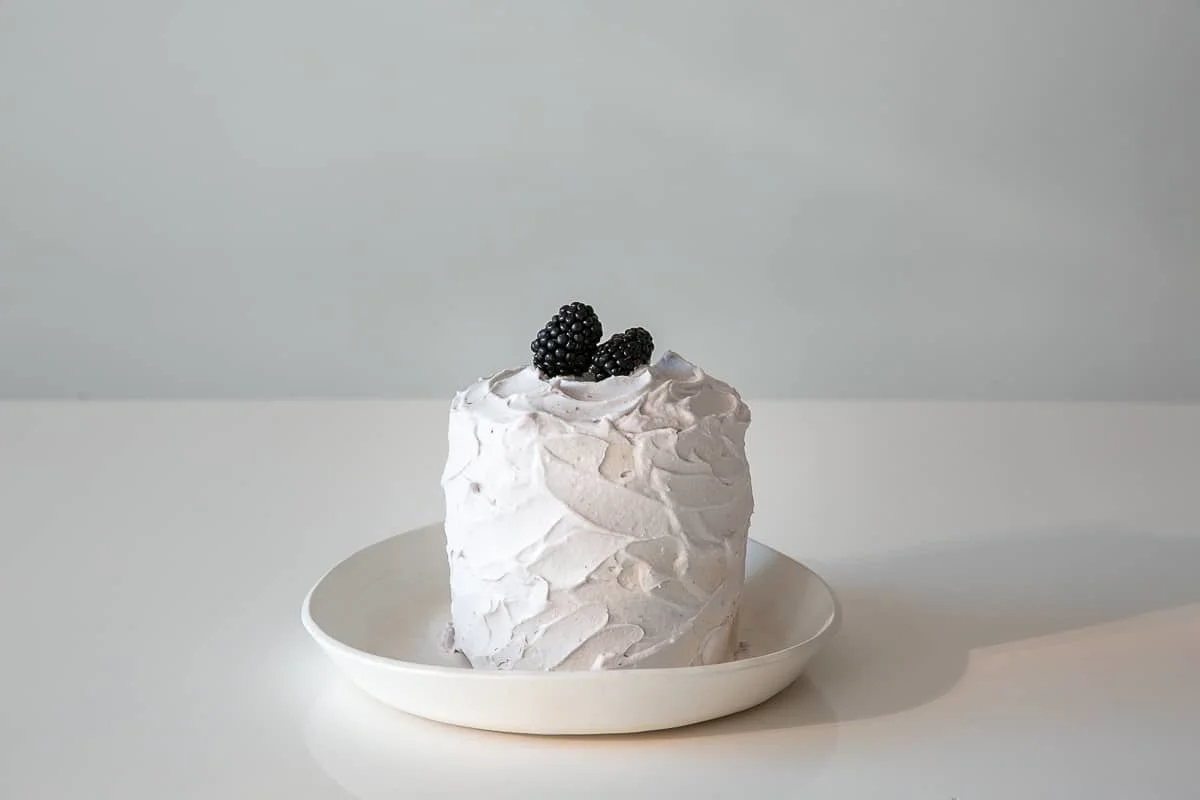
Parsnips are earthy and sweet like carrots, and just like carrot cake, shredded parsnips add interesting texture and savory flavor to your favorite bakes. Here, shredded parsnips are mixed with berries, which add a pop of color to the cakes. For a more purple cake, smash the berries as you mix them into the batter. Don’t have blackberries? Try blueberries, huckleberries, or loganberries.
Ingredients
1 parsnip
¾ c (108 g) blackberries
⅓ c (81 g) applesauce
⅓ c (76 g) coconut yogurt
⅓ c (64 g) coconut sugar (optional)
3 tbsp (45 ml) virgin coconut oil
2 tsp (10 ml) vanilla extract
1 ½ c (180 g) all-purpose flour
1 tbsp (15 g) baking powder
1 tsp (2 g) ground cardamom (optional)
Modifications
Banana - The riper, the better! If your banana is not yet ripe, using a bit more coconut sugar adds that touch of sweetness.
Berries - Try blueberries or huckleberries if blackberries are unavailable.
Coconut Oil - Using virgin or extra-virgin coconut oil (also called unrefined coconut oil) add coconut flavor to the cake. You can also use refined coconut oil, which has a more neutral flavor. If your coconut oil has solidified, melt it so that it is smooth and liquid before mixing it into the batter. You can do this by placing the jar of coconut oil in a bowl of hot water for a few minutes.
Flour - The gluten in wheat flour provides structure to the cake. Gluten-free flour can be substituted, though it creates a gummier texture.
Muffins - If you like, use this recipe to make a batch of muffins in a standard 12-cup tin.
Yogurt - Feel free to swap coconut yogurt for yogurt made of cow’s milk, nuts, or another ingredient once it has been safely introduced.
This recipe contains a common allergen: coconut (oil, sugar, yogurt) and wheat (flour). Only serve to a child after these allergens have been safely introduced. While coconut allergy is rare, it is classified as a tree nut by the United States Food and Drug Administration. Always check for potential allergens in ingredients listed on the labels of store-bought processed foods, such as yogurt. Added ingredients may include honey, which should not be given to babies younger than 12 months.
Directions
Preheat the oven to 350 F (177 C). Grease cake pans with neutral cooking oil, then line with parchment. Place the cake pans on a sheet tray.
Peel and mash the banana. This recipe needs ⅓ c (75 g) of mashed banana. A bit above or below that quantity will be fine, but if it is dramatically more or less, use a bit more applesauce.
Peel and shred the parsnip. This recipe needs 1 c (90 g). A bit above or below that quantity will be fine, but if it is dramatically more or less, use a bit more flour.
Wash, dry, and zest the orange.
Wash the blackberries, then quarter them if you want bites of berry in the cakes, or puree them if you want to give the cake a light purple color.
Stir the banana, parsnips, orange zest, berries, applesauce, coconut yogurt, coconut sugar, coconut oil, and vanilla extract in a large mixing bowl.
In a separate mixing bowl, whisk the flour, baking powder, and cardamom.
Pour the dry ingredients into the bowl with the wet ingredients. Fold the ingredients until no streaks of flour remain. The batter will be sticky and thick.
Evenly distribute the batter in the cake pans. Be sure to leave enough room for the cakes to rise without spilling over the edges. Use the spatula to smooth the tops and push the batter into the edges of the pans.
Bake until a toothpick inserted in the center of a cake comes out clean, about 30 minutes.
Remove the cakes from the oven and place them on a wire rack. Let the cakes cool in their tins for 10 minutes, then release the cakes from their tins to finish cooling on the rack. Wait until the cakes are cool to the touch before decorating or storing.
Ice the cakes with Silky Smooth Coconut Frosting or your icing of choice.
To Store: Blackberry Parsnip Smash Cake may be tightly wrapped in plastic and kept at room temperature for 3 days, in the refrigerator for 1 week, or in the freezer for 2 months. Defrost frozen cakes in the refrigerator a day or two before you plan to serve them. Note that refrigerated or frozen cakes become denser from the chill.
★ Baking for someone with Celiac disease or gluten sensitivity? Swap all-purpose flour with your favorite gluten-free alternative, such as Cup4Cup. The texture will likely be denser and gummier, but the cakes will be just as tasty and free of gluten for your loved ones!
Citrusy Squash Smash Cake
Yield: three 4-inch cakes
Time: 1 hour
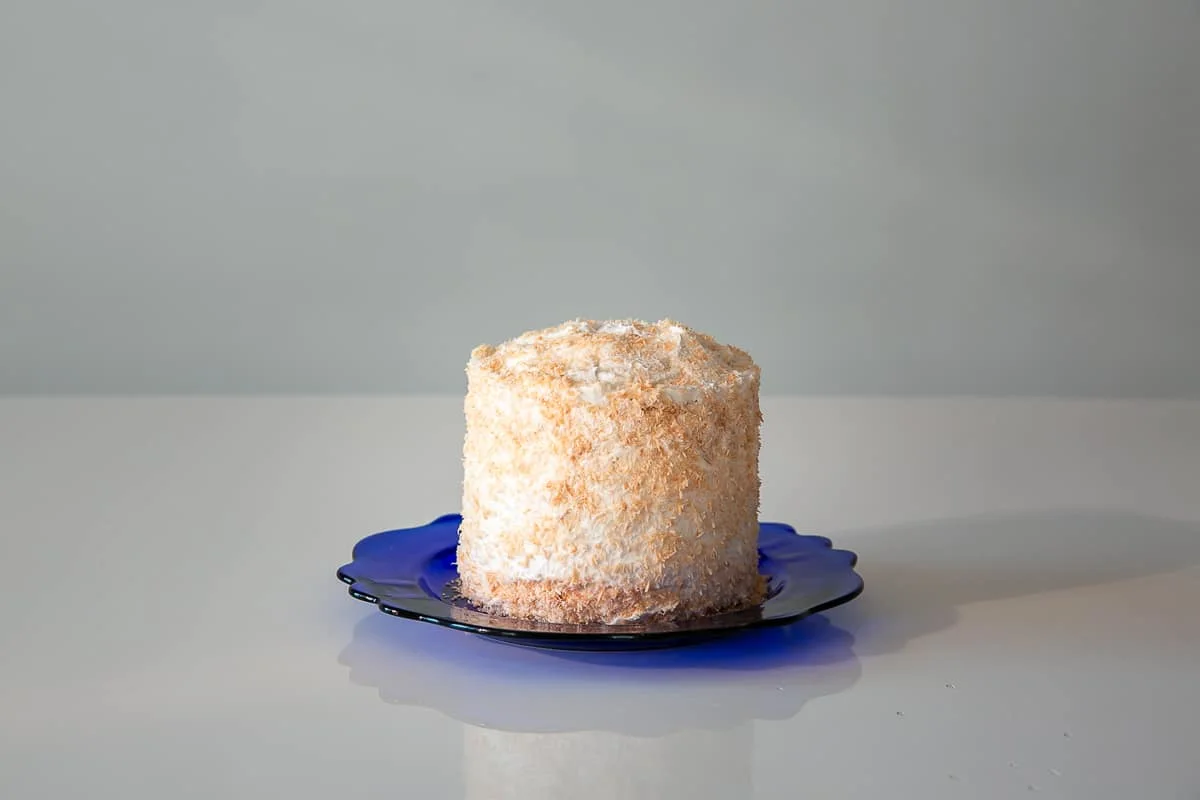
Our citrusy squash cake gets a blast of zing from orange zest and cardamom—a classic flavor combination. Feel free to swap in your favorite warm spice if cardamom isn’t your thing, and use freshly cooked squash or canned puree.
Ingredients
⅓ c (81 g) applesauce
⅓ c (80 ml) virgin coconut oil
⅓ c (64 g) coconut sugar (optional)
⅓ c (80 g) squash puree
2 tsp (10 ml) vanilla extract
1 ½ c (180 g) all-purpose flour
2 tsp (10 g) baking powder
1 tsp (2 g) ground cardamom
Modifications
Banana - The riper, the better! If your banana is not yet ripe, using a bit more coconut sugar adds that touch of sweetness.
Coconut Oil - Using virgin or extra-virgin coconut oil (also called unrefined coconut oil) add coconut flavor to the cake. You can also use refined coconut oil, which has a more neutral flavor. If your coconut oil has solidified, melt it so that it is smooth and liquid before mixing it into the batter. You can do this by placing the jar of coconut oil in a bowl of hot water for a few minutes.
Flour - The gluten in wheat flour provides structure to the cake. Gluten-free flour can be substituted, though it creates a gummier texture.
Muffins - If you like, use this recipe to make a batch of muffins in a standard 12-cup tin.
This recipe contains a common allergen: wheat (flour) and coconut (coconut oil, coconut sugar). Only serve to a child after these allergens have been safely introduced. While coconut allergy is rare, it is classified as a tree nut by the United States Food and Drug Administration.
Directions
Preheat the oven to 350 F (177 C). Grease cake pans with neutral cooking oil, then line with parchment. Place the cake pans on a sheet tray.
Peel and mash the banana. This recipe needs ⅓ c (75 g) of mashed banana. A bit above or below that quantity will be fine, but if it is dramatically more or less, use a bit more applesauce.
Wash, dry, and zest the orange.
Whisk the banana, orange zest, applesauce, coconut oil, coconut sugar, squash puree, and vanilla extract in a large mixing bowl.
In a separate mixing bowl, whisk the flour, baking powder, and cardamom.
Pour the dry ingredients into the bowl with the wet ingredients. Fold the ingredients until no streaks of flour remain. The batter will be sticky and thick.
Evenly distribute the batter in the cake pans. Be sure to leave enough room for the cakes to rise without spilling over the edges. Use the spatula to smooth the tops and push the batter into the edges of the pans.
Bake until a toothpick inserted in the center of a cake comes out clean, about 30 minutes.
Remove the cakes from the oven and place them on a wire rack. Let the cakes cool in their tins for 10 minutes, then release the cakes from their tins to finish cooling on the rack. Wait until the cakes are cool to the touch before decorating or storing.
Ice the cakes with Silky Smooth Coconut Frosting or your icing of choice.
To Store: Citrusy Squash Smash Cake may be tightly wrapped in plastic and kept at room temperature for 3 days, in the refrigerator for 1 week, or in the freezer for 2 months. Defrost frozen cakes in the refrigerator a day or two before you plan to serve them. Note that refrigerated or frozen cakes become denser from the chill.
★ Baking for someone with Celiac disease or gluten sensitivity? Swap all-purpose flour with your favorite gluten-free alternative, such as Cup4Cup. The texture will likely be denser and gummier, but the cakes will be just as tasty and free of gluten for your loved ones!
Silky Smooth Coconut Frosting

Yield: 2 ½ c (600 ml)
Prep and Cook Time: 3+ hours
Whip chilled coconut cream to make perfectly spreadable frosting—a great alternative for families who want a dairy-free and egg-free for cakes and cupcakes. Feel free to add sugar for a bit more sweetness or skip the sugar and let the natural sweetness of the orange juice shine. Keep in mind that not all coconut creams are created equal. This recipe was tested with organic, unsweetened canned coconut cream (not coconut milk) with a higher fat content, specifically, CoCo Goods, Let’s Do Organic, and Thai Kitchen.
Ingredients
2 13 ½-fl oz (400-ml) cans unsweetened coconut cream
1 tsp (10 ml) vegetable juice (optional)
Modifications
Coconut Milk - Keep in mind that coconut creams vary widely. This recipe was tested with organic, unsweetened canned coconut cream (not coconut milk) with a higher fat content, specifically, CoCo Goods, Let’s Do Organic, and Thai Kitchen.
Vegetable Juice - Use vegetable juice (not puree) to color the frosting. Red beets make pink frosting. Blueberries or blackberries turn it purple. Carrots make it orange.
This recipe contains a common allergen: coconut (cream). Only serve to a child after this allergen has been safely introduced. While coconut allergy is rare, it is classified as a tree nut by the United States Food and Drug Administration.
Directions
Prepare the Frosting
Store the cans of coconut cream in the coldest part of the refrigerator for at least 24 hours. The cream must be very cold, but not frozen.
About 15 minutes before you begin whipping the frosting, place a metal mixing bowl in the freezer.
Turn the cans upside down and use a can opener to open the bottom. Scoop the coconut cream into the chilled mixing bowl. Reserve any liquid for another use, like smoothies or soup.
Juice the orange. Measure 2 tbsp (30 ml) of juice, then pour it into the mixing bowl with the coconut cream. Store the rest of the juice for another use.
Whisk the coconut cream and orange juice until smooth, thick, and fluffy. The more it is mixed, the thinner the frosting gets. If the frosting seems too thin after whisking in the orange juice, place the bowl in the freezer and let it chill for 30 minutes.
Color the Frosting
The frosting may be colored by whisking in drops of fruit or vegetable juice (not puree).
To create frosting for an ombré effect on a cake, separate the frosting into three bowls: 1 c (240 ml) of plain white frosting in one and ¾ cup (180 ml) in each of the other two.
Use vegetable juice to color frosting in the bowls with ¾ c (180 ml). To color frosting, whisk in one drop of juice at a time. Keep adding drops, one at a time, until the desired color is reached. Make one bowl of frosting darker than the other.
Keep in mind that the more liquid that is added to the frosting, the looser it becomes. If it becomes too thin, chill the frosting in the refrigerator for 30 minutes. At this point, the frosting may be used to decorate the cake or stored in the refrigerator to decorate later. See storage instructions.
Frost the Cake
Place the first cake layer on a serving plate. Spread a scoop or two of frosting on top, then add the next cake layer. Repeat.
Frost the outside of the cakes. To create an ombré effect, first, ring the cake with the darkest frosting, then add a ring of the lighter frosting. Use a knife or spatula to blend them together. Finish the cake with a ring of white frosting, and blend it into the colored frosting. Top the cake with the frosting color of your choice.
Chill the cake until you’re ready to serve them. Coconut frosting holds its shape in mild climates at room temperature for up to 2 hours, after which it starts to soften and even melt in warmer temperatures.
To Store: Silky Smooth Coconut Frosting is best used to decorate cakes on the day that it is made. If you’d like to make it ahead, it can keep in an airtight container in the refrigerator for 2 days though it may need to be whipped again before decorating.
Easy Homemade Applesauce

Yield: 3 c (720 ml)
Time: 45 minutes
Ingredients
2 lb (908 g) apples
½ c (120 ml) orange juice
Directions
Wash, peel, and core the apples. Cut the flesh into chunks.
Juice the oranges.
Place the apple chunks and juice in a large pot set on medium heat.
Bring the mixture to a boil, then immediately reduce the heat to create a gentle simmer.
Partially cover the pot and cook until the apple chunks have softened and fallen apart, about 30 minutes.
Let the applesauce cool in the poot. Mash any remaining large chunks of fruit.
Serve the Applesauce
Offer applesauce and let your child self-feed.
If help is needed, hold a pre-loaded spoon in the air in front of your child, then let them grab it from you.
Eat some applesauce alongside the child to model how it’s done.
To Store: Applesauce keeps in an airtight container in the fridge for 3 days or in the freezer for 2 months.
Ready to get started?
Download the app to start your journey.
Expert Tips Delivered to Your Inbox
Sign up for weekly tips, recipes and more!
